Hacking GV’s Design Sprint Storyboarding to get results faster, with less stress.
We at AJ&Smart are big fans of GV’s Design Sprint. Beginning of 2016, we committed ourselves to work in Design Sprints exclusively, and it immediately became clear that it’s the best process to get things done at a faster pace and at a higher quality. Our clients love it, too, and we try to get them to run their own Design Sprints in their companies — we don’t just run sprints for them, but also teach their teams the process along the way.
However, we also love tweaking processes to fit our way of working better. The most obvious deviation from the GV template is that we run our sprints in 4 days instead of 5. But our most recent tweak of the process concerns the most intense part of the Design Sprint process: Storyboarding!
What’s a Design Sprint Storyboard?
I won’t go too much into detail how Storyboarding in a Design Sprint works (you can read how it works in the fantastic Sprint book, the best design-related book I have read in years, or in our article about a sprint we did for the UN’s World Food Programme), but it’s a crucial step in the process that bridges the gap between rough concept sketches and a testable, high-fidelity prototype. The idea is to sketch out an entire journey through your product or service with enough detail so that everybody is aligned on what goes into the prototype.

If you have already run your own Design Sprint, you probably know this: Storyboarding takes a lot of time to get right and involves a lot of discussion and going back and forth, forcing the artist to start over many times. It works! But compared to the preceding parts of the sprint process it sometimes feels unstructured. It’s easy to get frustrated and at the end of the day we often felt tired and a bit braindead.
One thing we really enjoy about working with the sprint process is that at the start, everyone is working together, alone. While everybody is working towards the same target, they get to think about their concept on their own in peace. We felt that this was missing from storyboarding.
Structure instead of endless back-and-forth
So, in our last sprint, our resident process guru Martin suggested a little hack: Instead of diving straight into storyboard sketching, we wanted to agree on a rough sequence of actions first.For this we borrowed from Tom Wujec’s How To Make Toast and User Story Mapping.
Let’s take a closer look at the new exercise!
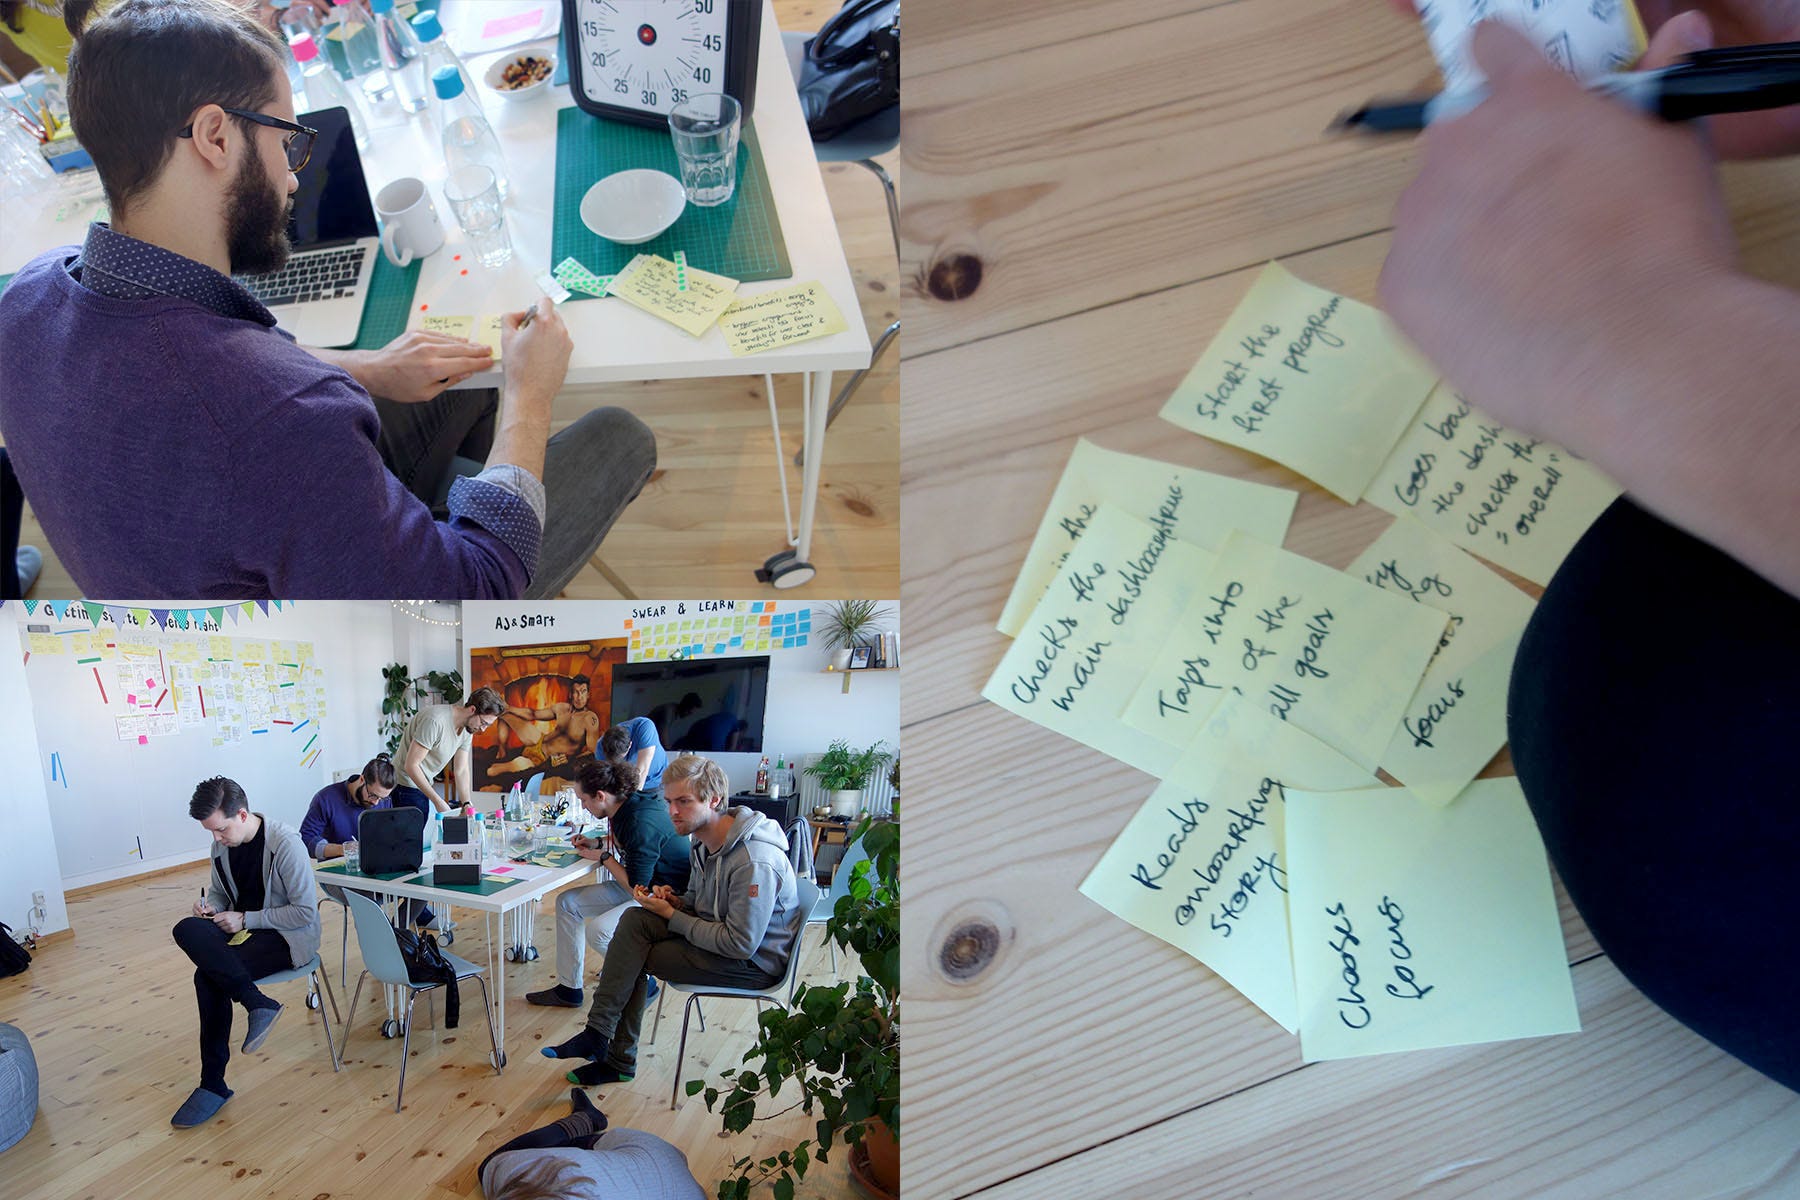
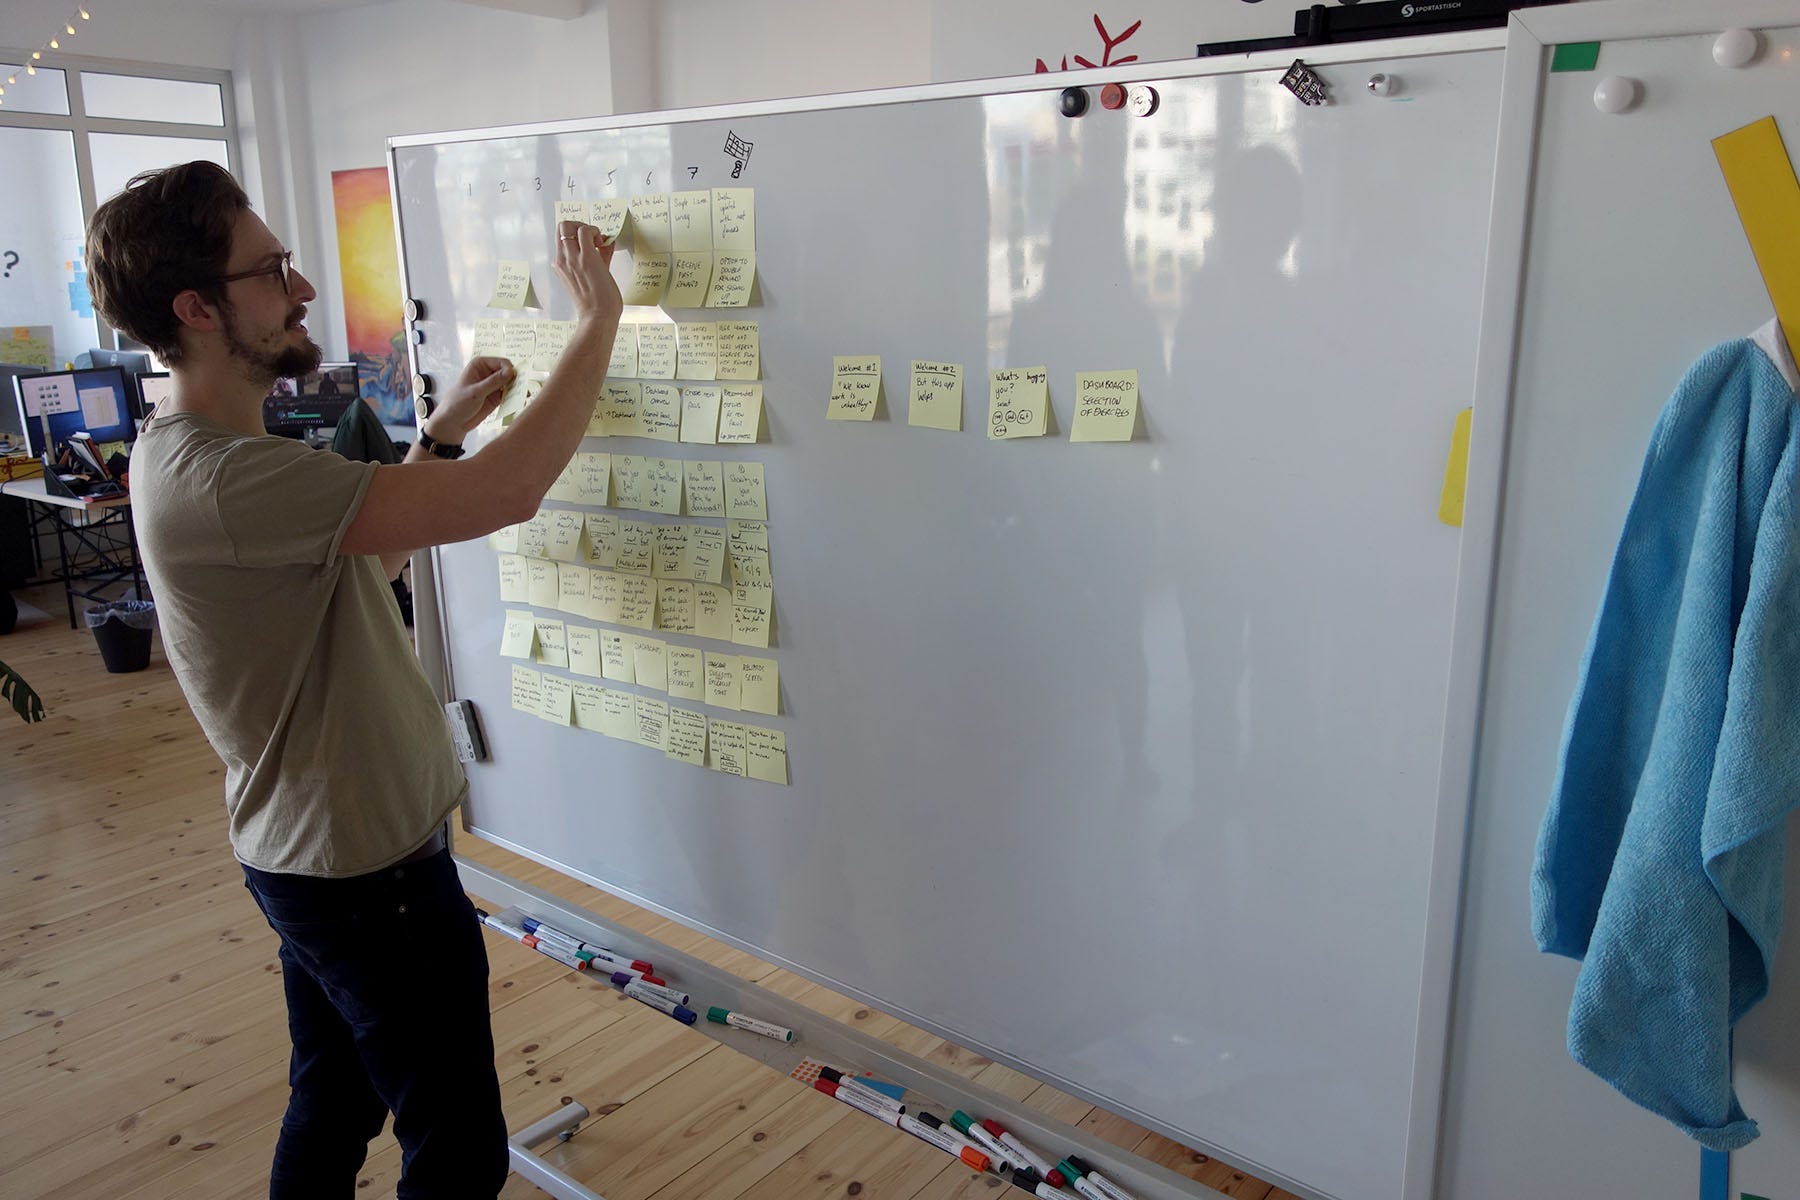
First, we ask every sprint participant to take eight sticky notes and, in 2–3 minutes, write one key user action on each sticky note — going from the first product discovery until the end, while keeping the sprint questions in mind.
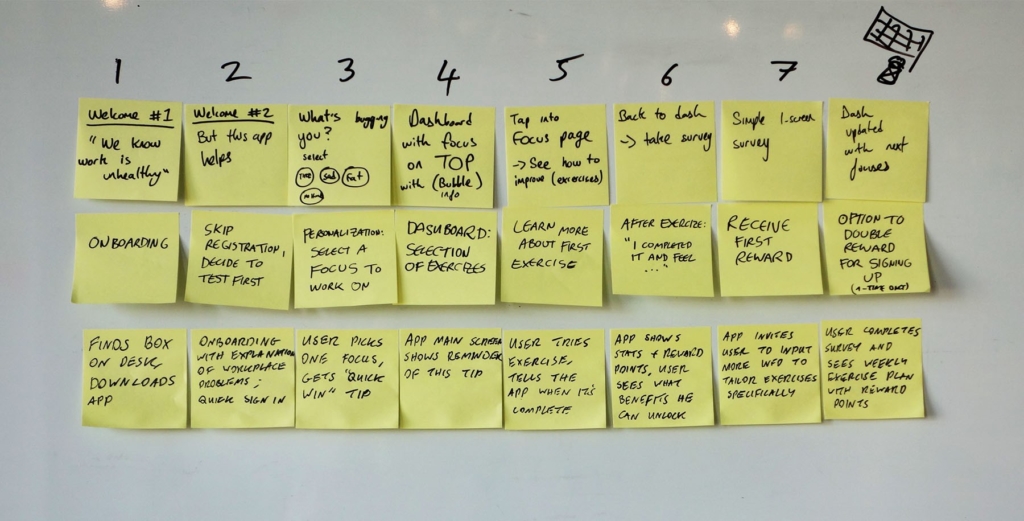
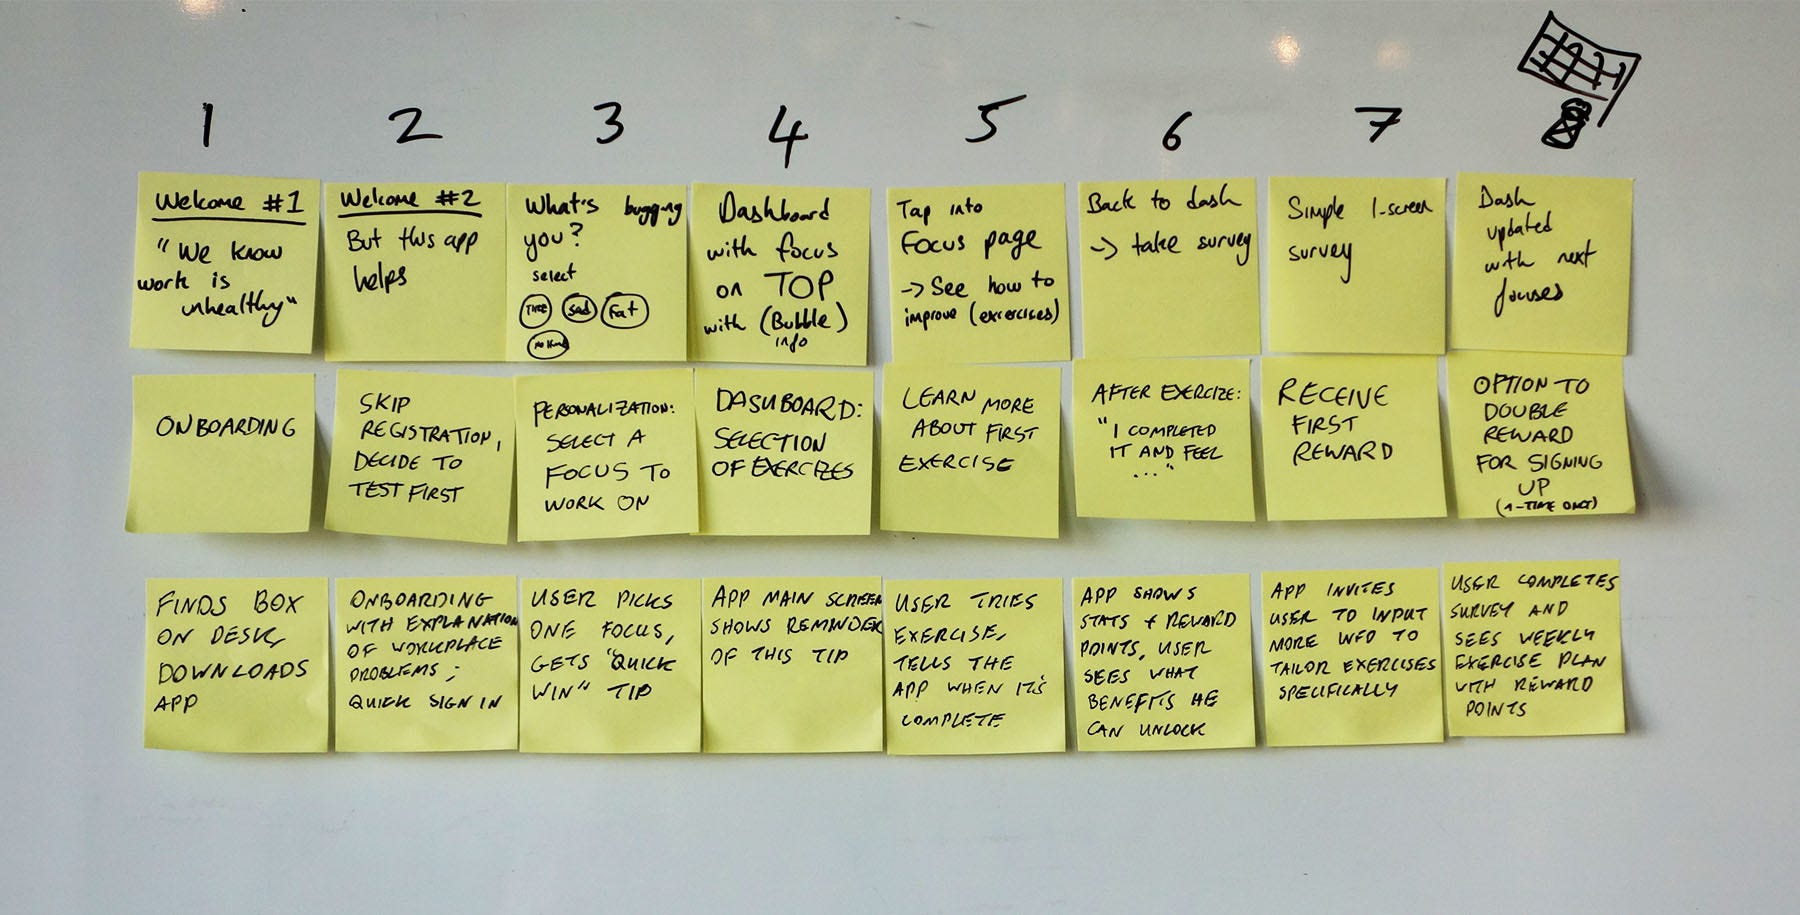
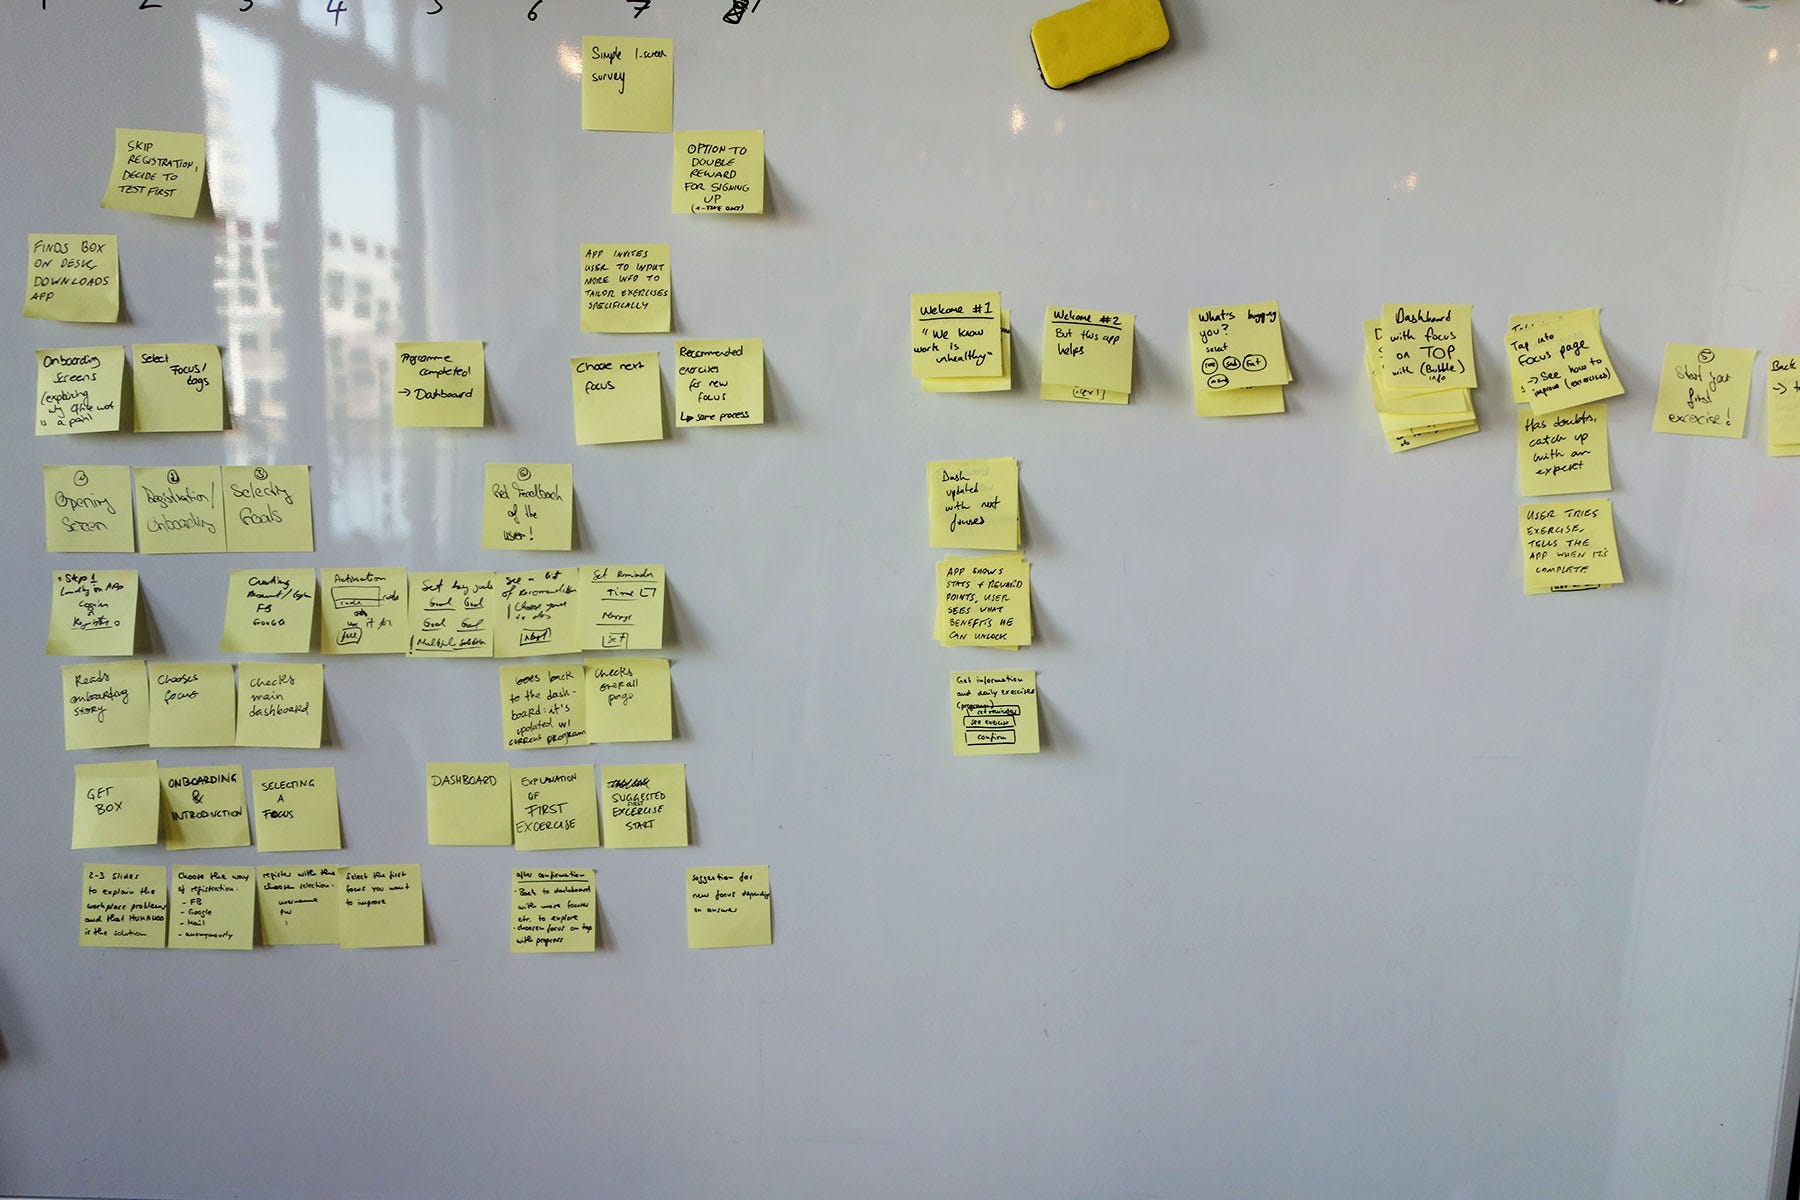
After this is done, we stick each timeline in straight rows underneath each other: All first steps in column no.1, all second steps in column no.2 and so on – until you have a neat matrix of sticky notes with each participants’ idea what they think should happen in the prototype.
There will be differences between each participant’s timelines, but some patterns will start to emerge: it becomes obvious where the sprint team is aligned and where there is still need for discussion.
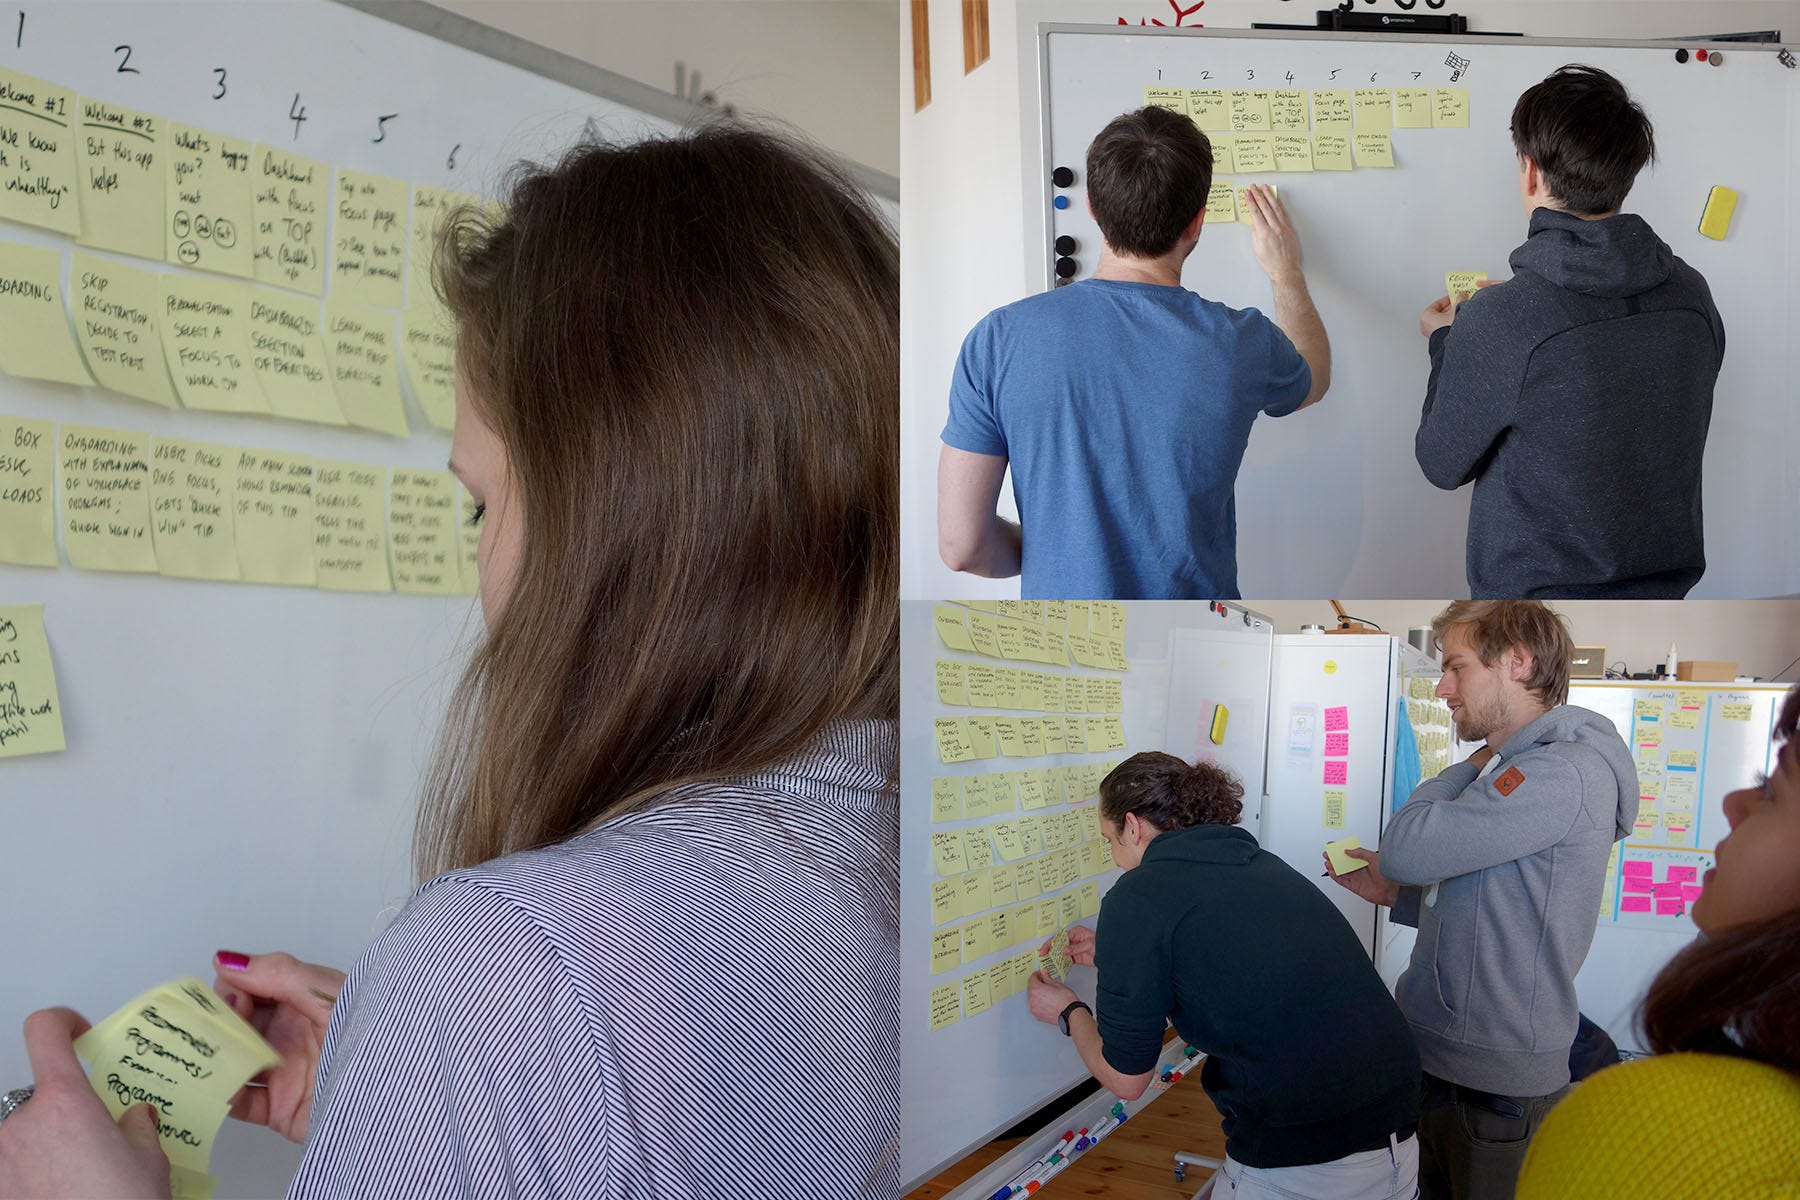
Once the matrix is done, our moderator goes through each row quickly and, as soon as anything comes up that is repeated in other timelines, takes these sticky notes, sticks them to the side of the matrix and starts to form one master timeline with them. With each row, the master timeline begins to become more fleshed out and concrete.
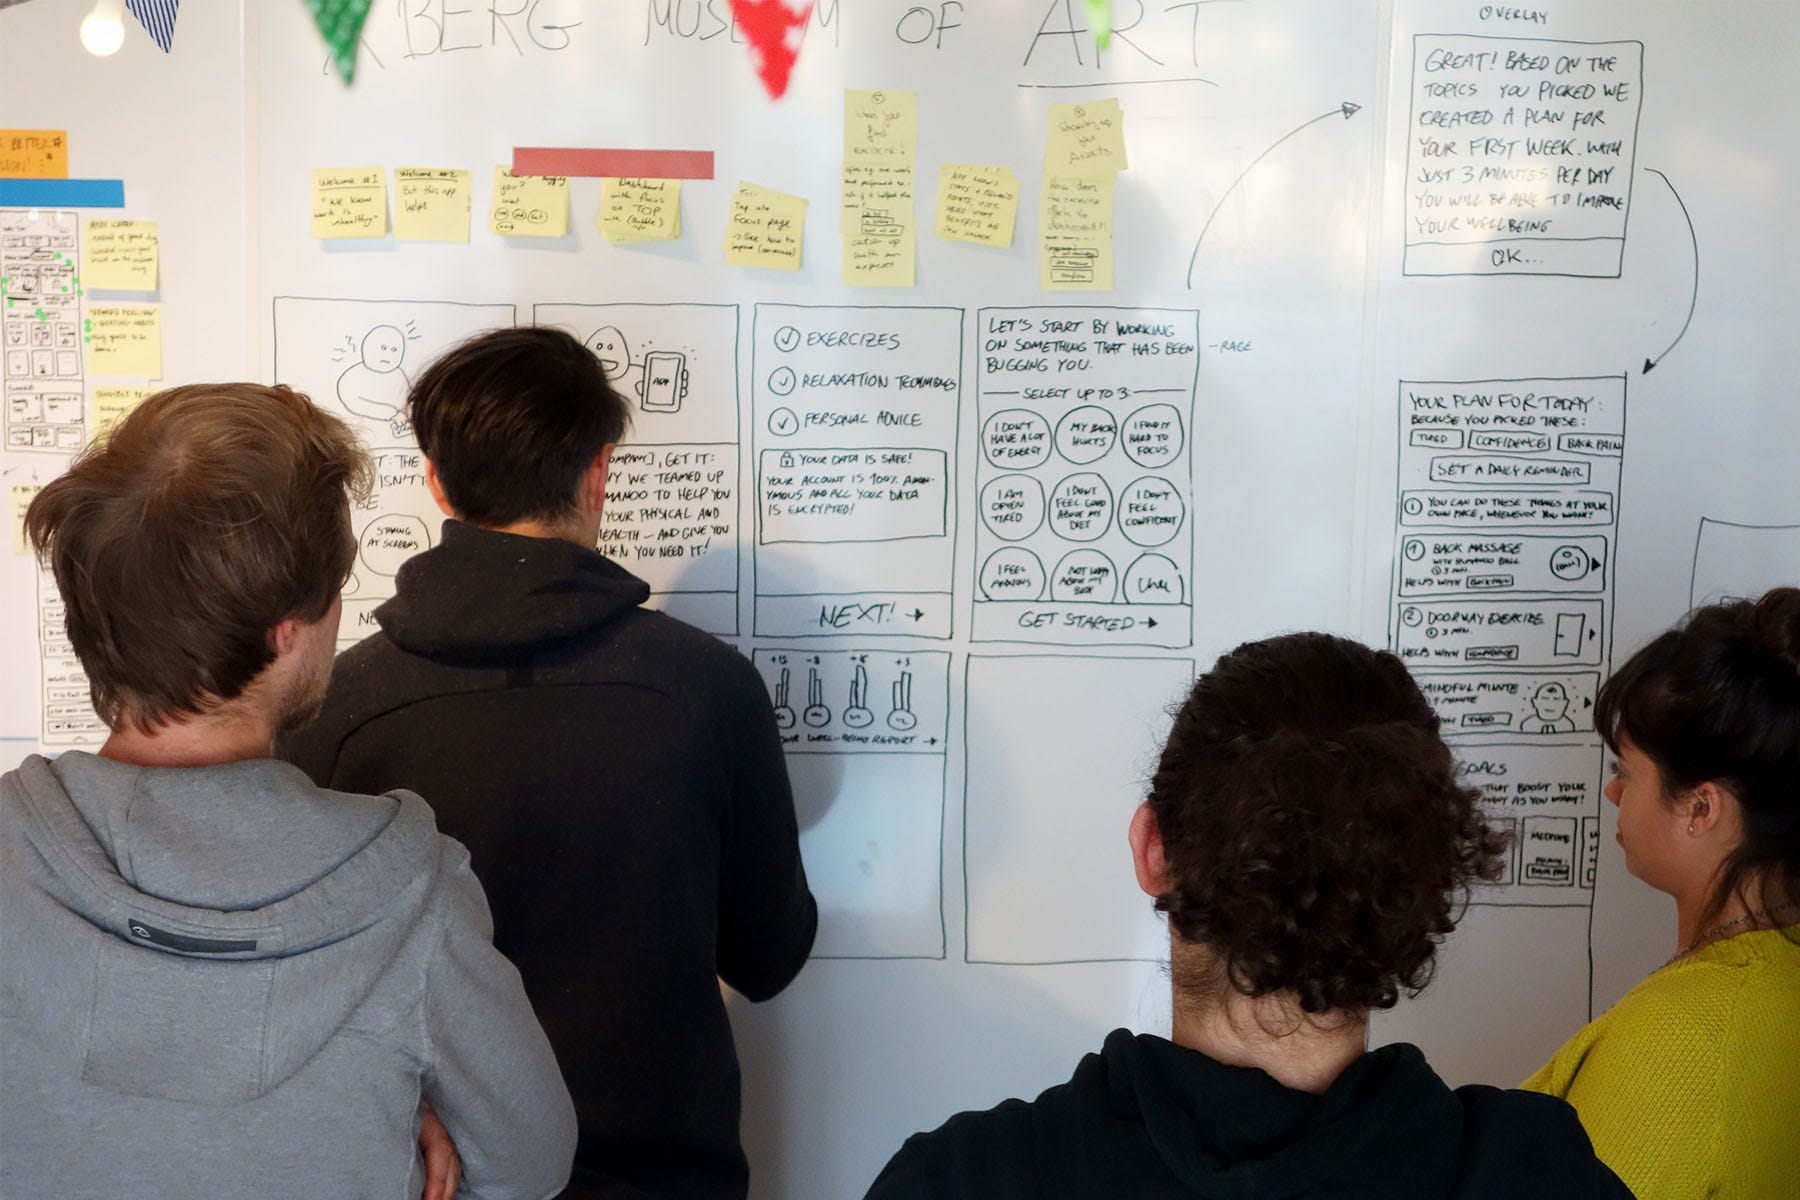
At this point, there is still a lot of room for discussion, but the sticky notes allow us to quickly rearrange the order or swap key actions in and out.We are also able to identify holes in the concept before the artist draws the first line. If you get stuck in a discussion, just ask the decider to make the call!
We now have a master timeline of about 8 to 10 key actions, which we stick to the storyboarding whiteboard. During the actual storyboarding, we can use it to keep things on track!
How did it help?
Since we introduced this little tweak to our sprints, we noticed how a lot of stress was removed from the storyboarding process. Of course discussion still happens — as it should. But instead of endlessly talking about what should happen after the loading screen, the group is now free to discuss the overall concept in greater detail. A nice side-effect: Using this method, we ended up saving up to one hour.
This demonstrates another strength of GV’s Design Sprints: it’s easy to adapt them to your needs. So when you run your next sprint, give it a try and let us know how it went!